Thursday, November 28, 2013

ALO audio "The Continental v3" with Astell and Kern AK100


29/Nov/2013 Update: I had acquired a new ALO audio "The Continental v3" tube hybrid amplifier and currently am tagging the AK100 along with it. Reviews would come in the (not too distant) future.

As seen from above, the current setup consists of the following in order - Astell & Kern AK100, ALO audio SXC-18 mini - mini interconnect - ALO audio "The Continental v3" Portable Hybrid Tube Amplifier.

In case if any of you are wondering how I stick the two unit together so nicely, it was done with the help of 3M Command Velcro :) really handy stuff..

To be able to properly evaluate, I need to first replace my aged UE Triple.Fi 10 IEM and let the amplifier break-in (not to mention the new Roxannes need to break in as well.)

Battery life of the Continental v3 seems to be between 7 - 8.5 hours, depending on the load. The amplifier gets quite hot during use but the heat will not be sufficient to cause burns although keeping the amplifier in your bag or pocket may trap the heat and in turn shorten the lifespan of the unit (not to mention being uncomfortable if it is in your pocket).

As of current moment, the connection port for my UE Triple.Fi 10 is already worn beyond salvation and I am still (patiently?) awaiting the arrival of my JHaudio Roxanne CIEM.

ALO Audio SXC-18 mini interconnect Review

ALO Audio SXC-18 mini interconnect Review

Disclaimer: This is not a sponsored review and "sound" for that matter is completely subjective and likewise is personal preference. What is stated in this review is only my opinion and may serve as your guideline on what to expect, if you wish to.

ALO Audio's SXC-18 silver plated mini-mini interconnect for portable application.
 
For those who do not know, ALO Audio is relatively quite well known for their high quality audiophile grade wires. Interconnects such as the one being reviewed in this article is used to connect the output of DAPs (Digital Audio Players), such as those of Astell & Kern AK100 or the newer AK120 to a portable headphone amplifier such as ALO Audio's "The Continental v3". Such elaborated configuration is required for higher impedance headphones or IEMs (in-ear monitors) to provide enough power for driving them, allowing them to run at their full potential.
 
Audio players such as iPhones and iPods does have built in headphone / earphone amplifier. However, these devices could not afford enough space to provide an amplifier powerful enough to release the full potential of high impedance headphones such as the Sennheiser HD800 or for the matter, the Etymotic ER4S IEM (which has 75Ohms impedance). The most obvious result of such low powered amplifier was the soft music that lacked any body or impact, making you feel like throwing the all time expensive HD800 into the rubbish bin in favor of cheaper easier to drive alternatives.
 
ALO audio provides a range of selection on cable termination options such as mini - iPod line out dock, mini - mini, compact mini - compact mini (essentially right angled mini connections but at a significantly higher price) and two different cable sizes (SXC-18 and SXC-22) with the numbers indicating the cable size (18G vs 22G). They also offer non-silver plated copper cables if that is your preference.
 
Silver plating provides a more neutral sound compared to copper only cables. Copper only cables generally, in my opinion, provides a warmer sound which may be more to the liking of some others.
For that matter however, ALO audio doesn't provide 18 gauge sized copper only interconnect but they do have "Reference 8" which were made up of 4 copper and 4 silver plated strands that, in my opinion again, gives a slightly warmer sound than that of SXC-18 at 1/3 additional costs. They also offer "The Green Line" interconnect which costs below SGD$100 if costs is the limiting factor, but I'm not going to mention anything on that since I have yet to try it.
 
Sound Impression and costs justification
The interconnect I had got from Jaben years ago (I think it was 6 years ago) and the SXC-22 would be my reference with regards to most of the comparison. I had tried ALO audio's Reference 8 in both iPod line out and mini - mini configuration before but had not had enough time to be able to evaluate them. I had been using the thin little silver interconnect for 6 years and was impressed by the neutrality of the sound compared to the even cheaper (but destroyed) copper interconnect I originally started out with. This originally impression, was completely obliviated after trying out the SXC-22. The larger gauge cable simply provides an unmatched fuller bodied sound I was used to. SIMPLY. The SXC-18 provides even more but body but probably does not justify for an almost 100% costs increase from SXC-22. However, one has to realize that price and performance is not a linear correlation. It has always been an exponential function. I chose the SXC-18, until now (actually only a week) I had not regretted my decision when the sound feel noticeably fuller and wider.
 
One thing to note: These wires (including the small gauge wire from Jaben) are flexible but there is a certain limit you can flex them if you do not wish to break them. They also retained the shape you bent them into quite well. Generally the larger gauge wires would retain the shaper better. If flexibility is the priority, I think a cheaper wire or smaller gauge wire should be higher in the consideration list.
 
The SXC-18 mini to mini interconnect comes in small box (but relatively big to the interconnect's size).

ALO audio's packaging consists of a sleeve with sticker indicating the product that it holds securing the box.
 
The SXC-18 is being held in a small foam pack inside the box. I could not think of a better way of packaging the product than what is already done :)

ALO audio's SXC-18 (below) and some unknown brand silver plated interconnect from Jaben (top)

The price you are paying for is mainly for the size of the cable. It is actually oversized for such application. ALO audio's SXC-18 uses a 18 gauge silver plated cable, compared to the unbranded from Jaben (looks like 31 gauge from guesstimate).
 
Photos taken with Nikon D700 on PC micro Nikkor 85mm f/2.8
 
Richard (29/Nov/2013)

Friday, November 22, 2013

Astell & Kern AK100 Digital Audio Player (DAP) Review

Astell & Kern AK100 Digital Audio Player (DAP)

My first digital audio player was a Sony MD (MZ-R55) (mini disc - for those who don't know) player, followed by another MD player from Sony (MZ-N10), a magnesium alloy 10 year anniversary edition with Li-ion rechargeable battery and MDLP support (simply low quality compressed ATRAC3 support). I subsequently switched to Apple iPod mini (1st Gen) since I couldn't afford the full size iPod. Little do I know at that time apple actually did use high grade Wolfson DACs in their iPods (except for the minis). Apple no longer utilizes Wolfson DACs for their iPods after the 5.5 generation. Well, I did purchase a iPod Touch (1st generation) after the iPod mini. When I got my first iPhone (3GS, followed by 4S), I no longer use an iPod since the iPhone could functionally replace the dedicated music player.

The AK100 comes with a 5 song MQS sample which allows you to savior the taste right out of the box (not to worry, the AK100 is charged!)

A few months back, it came to my realization that I needed some dedicated audio player to better utilize my IEMs (currently a UE Tripple.Fi 10 and Etymotic ER-4s) and the headphone amplifier I purchased while I was still enthuthestic about high quality audio (currently a TTVJ Millet Hybrid Tube). I went to order a pair of CIEMs (JH Audio's Roxanne), without hesistation, after a short audition session with the JH16 Pro. Together with the purchase, I also picked up a GoVibe Vulcan+ solid state headphone amplifier and the Astell & Kern AK100 DAP. I shall write about the GoVibe Vulcan+ and Roxannes elsewhere when I have the time.

The AK100 accepts two uSD cards (micro SD) as expandable storage, with support up to 32GB per card (at firmware 2.30).

The Player

Main difference between AK100 and AK120 on paper was (to me) only lower output impedance and double Wolfson DAC for the AK120. The use of Wolfson DACs were a selling point for these two iriver audio players. I decided to go for the AK100 since I double I would be able to hear any significant difference that could justify almost double the price of the AK120 (SGD14xx). As such, I've got the silver edition of the AK100 player, not because I wanted silver but just so happen that it was the last available unit at the time I decided to purchase. Part of the decision was because there was no AK120 available for audition at the moment of purchase or perhaps I was just too reluctant to ask and spend twice the amount for what I did for AK100.

You may wish to purchase Astell & Kern MQS Selections, in micro SD format - ready for the AK100!

The player plays almost all audio formats you can throw in with the current firmware version (v2.30). File transfer from computer to player was as easy as copying from one hard disk to another external drive. The latest firmware version also allows you to use the DAP as a USB DAC, which I find it particularly useful especially I do not own a USB DAC and I can easily connect the AK100 as DAC to a headphone amplifier to play high quality audio files from a computer system.

If switched on, when connected to computer, the player would ask if it were to switch to the following mode of operation: (1) Charge Battery Only, (2) USB DAC, (3) Connect as a disk.

The AK100 would automatically scan (by default setting) to scan for digital media files in its uSD card and the internal 32GB memory every time a file transfer process was done. The scanning may take up to a minute or two depending on the number of files saved in the memory and / or the uSD card. The waiting time is sometimes rather irritating but once it has done the scan, it would not be required to do another scan when you reboot the AK100 unless some new media is written on the memory again.

The player interface needs some work to be done. But I have seen good improvements from firmware 1.20 to firmware 2.30, hopefully it doesn't end here.

Build Quality

The player build quality is solid. The whole unit chassis seemed to be machined out from a sold piece of aluminum. Generally, the built and construction - the choice of materials chosen, is definitely better than current iPods.

Package

The retail box with magnetic flaps secured by a sleeve contains the following items:
  • Astell & Kern AK100 Digital Audio Player
  • Pouch for AK100 (Cloth)
  • USB Connection cable
  • MQS (Master Quality Sound) sample uSD card (5 tracks)
  • Warranty card
Sound Quality and Impression
One of the highlights of the AK100 is its ability to play 24Bit 96Hz files. Apple devices generally are stuck at 16Bit 44.1Hz files (apple lossless). Another thing that I noticed the first time I used the AK100 on an IEM was how clear the background was. It was the most noiseless player I had tried to date. The MQS sample files provided gave an indication of how this player can perform.
One characteristic the AK100 gave to its music is cold and technical. The music from the player lacks warmth. Perhaps the coldness gave it more resolution. But what came out seems analytical enough with no colorations, maybe it could be described as lean. Good battery life in normal day to day commuting (public transport) usage. I estimate the built-in internal battery life would easily surpass 12 hours continuous usage with the official specifications stating 16 hours battery life. Interestingly, for such a small audio player, the AK100 has a built-in amp powerful to drive Etymotic's ER4S to relatively loud levels, enough to damage your hearing (the Etymotic ER4S has an impedance of 75ohms, relatively high for an IEM).

Overall
The overall impression I have from this unit so far was enjoyable since I'm currently pairing with TTVJ Portable Millet Hybrid Amp or GoVibe Vulcan+ amps to slightly color the sound to my liking according to my mood.

Pictures courtesy of Keefe and his (now sold and upgraded to Sony A7R) Olympus OMD EM1 with Olympus 60mm f/2.8 macro m4/3 lens.

-Richard (22/Nov/2013)

Saturday, November 9, 2013

Olympus OMD EM-1 Short Review


OMD EM-1 Short Review


The OMD EM-1
Olympus announced the OMD EM-5 in February 2012, and it was regarded as one of the best Micro Four-Thirds (MFT) body at that time. However, less than two years later, the EM-1 was revealed and released in October/November 2013. Is this camera really worth the buck – is it a powerful camera in its own rights? We had a few days with the EM-1 with an Olympus 60mm Macro, and the 12mm F2 to find out.

In reviewing the IQ of the MFT body, I have stepped down my requirements owing to the fact that it IS a MFT camera – hence I will not be using the bastion of Leica M series to compare it with. We KNOW that the bokeh/depth of field of a MFT will never ever beat that of a full-frame and it is unfortunately, one of the saddest fact of any MFT body.

Aesthetics (6.5/10):

Placed next to my Leica M9P, the EM-1 looks very, very modern. Olympus chose to forego the vintage look that they had clinched so perfectly with the EM-5 to add on a DSLR grip to the body. Yes – the camera now handles ergonomically fantastic but now it looks like an ugly mix of Chinese and Indian food. In fact, the EM-1 looks more like a DSLR now, especially since the size of it is not in particularly very small. Held next to the M9, there is hardly any notable differences except in the weight.

So, so many buttons...


Ergonomics (8/10):
The EM-1 handles perfectly and feels very light to the Leica-enthusiast. It almost feels plastic-like, which is a welcomed change to the brick-metal weight of the M9. The added rubberized handgrip is perhaps the best part of the design (which took off all aesthetics) as I was able to handle almost 90% of my shots with one hand, partly in thanks to the 5-axis IBIS as well. The EM-1 starts to falter as it gets ambitious – there are way too many dials and buttons. HDR, AF, on-off, AEL-AFL switch, Live-View switch…. The list goes on. There are nineteen (19!) buttons (no this is not accurate, I did not bother to check), 2 switches, and 3 dials on this beast. I mean, seriously? In contrast, the M9 has only 11 buttons, 1 switch and 2 dials. This many buttons took away the ergonomics of it – it just shows that the engineers couldn’t be more innovative enough. Because of this, I took 2 points off the ergo, simply because I felt the design was lazy.

Image Quality (9.5/10):
Boy, was I impressed with the out-of-camera images from this little/huge beast. Olympus did the correct choice in removing the AA filter and upping the sensor IQ as this, honestly, is the only selling point of the OMD at the moment (we will talk more about it at the conclusion). JPEGs that come straight of the camera, which can be then directly Wi-Fi to your phone makes it a luxury for the travelling photographer. These images look fantastic. The detail is fantastic. The 5-axis IBIS makes it super-easy to capture relatively sharp shots without much skill.
The RAW files are the real deal though. When I loaded the images into LightRoom on my 1440p screen, I was shocked. I had expected 16 megapixels to look like crap and I was impressed. I had walked around the supermarket taking pictures of random stuff and I *did not* expect any of my images to turn out good. But I was pleasantly surprised! I only had to do minimal adjustments, such as adding very minimal clarity. The camera captures white balance correctly 99% of the time, the auto-focus is SPOT-ON perfect ALL the time.
  
Red Apples

What I really like about the camera however, is the color rendition. The apples look deliciously red and my aji-tama (tasteful egg) looks exactly the same as real-life.

Next, I had some fun with the in-camera HDR composition. I was not very impressed – but neither was I unhappy. I would say that the HDR does what it does to a limited extent. You will not expect overly dramatic HDR, and it also really depends on your landscape. I chose a bad place with the shot below – but hey, I am not a fan of HDRs.

HDR on Overcast Evening


Olympus seems to do some kind of sharpening to the pictures. When cropped to 100%, you could see a grainy texture to the images. I am not in particular unhappy about that but it should be something to take note of if you are not one that likes that kind of feel.

Conclusion (7/10):
Olympus has done very well with the EM-1 image quality. I have not expected such good IQ from a MFT, and I was pleasantly surprised. The camera also handles ergonomically well if you can forget the ugliness of it, and the shutter sound is beautifully soft and even cute. There are also many other features of the EM-1 which was not reviewed (I mean, we do have 20 buttons!) – such as waterproofing, 5-IBIS, and the other multitude of functions which could sway the potential buyer to getting one. I for one got it for purely macro photos, and it does that, pretty much perfectly.

Unfortunately, the release of the EM-1 came at a time where Sony also announced their upcoming A7 and A7r series which is a full-frame mirrorless in a body that is very similar in size (maybe smaller?) to the OMD. The OMD is NOT cheap, it is priced at $1399 USD whereas the A7R, which packs 36 megapixels, is priced at only $2399 USD. This differential is very easily justifiable in my opinion. An informed buyer at this point of time would hold-off the purchase, and wait for more IQ samples for the A7/r.

The OMD does of course, have a wide-array of lenses that are fantastic optically at the moment. While Sony currently have crappy lenses for the A7/A7R, adaptors can serve to augment (we can use leica lenses!) that, and Sony has announced a very big lineup to support the A series. In addition, with Sony breaking the barrier of having the smallest FF camera, we can expect other giants to go into this market and very soon, there will be great lenses available for FF mirrorless tiny cameras. In fact, we just had the Nikon DF being announced as well. All this will only cause the OMD value to keep going downhill and thus it will not make to be a good purchase.

Despite a bad value, the OMD EM-1 by itself is a strangely great camera. I feel that it does have some kind of elusive charm where I cannot quite say that it is beautiful but yet has its own mysterious usefulness. In terms of size, it is huge and does not pack the punch of the new FF-mirrorless, and it is not small enough like the Panasonic GM, yet it still delivers beautiful, sharp and colorful pictures.

It is in a nutshell, neither here nor there.


Samples Gallery (some images are cropped):


Tuesday, September 24, 2013

e-flat by Fogg: Short Review

The Fogg e-flat camera bag
 
Today I decided to write up a short line on my just received Fogg e-flat, ordered 3 months ago from Chiif Cameras. - Mine was a Havana\Black colour combination.
 
First impressions
The e-flat satchel is large but in no means excessively huge. I ordered mine with extra laptop dividers so I could use it as my everyday work bag if I decide to do so or when necessary.
 
 
You could have the option to have your name sewn onto the bag (inner surfaces) at no additional costs. However it means you won't be able to sell off should you decide to in the future!
 
 
In place of the usual dividers (x2) + 1 trap door configuration, I had a laptop divider and two dividers of smaller width (additional costs) for my documents and stuff I bring to work everyday. 
 
 
Above: with the laptop divider in place and the usual stuff I carry to work excluding the Leica M and lens (detached). It has plenty of room. My pencil case took a huge chunk of space (because the case was quite big)

With the usual divider (2+1 trap door) configuration in place, there is little doubt this bag could carry a full size SLR.
The e-flat was also less than bulky than the crumpler's mid size camera shoulder bag but offering larger space than the crumpler's offering. - a side by side comparison should be done in the future in this respect.
 
 
As seen below, the buckle seems to be made of solid brass! it actually has weight! you could feel the weight!!!
 
 
The bag is also stiff enough to be self standing.
 
 
Build quality 10/10
 
The build quality of this bag is way beyond any other bags I had (two crumplers and three lowepro bags). The quality of materials used and level of detail this bag has is beyond my expectation. As such, I foresee this bag would serve me for a very long time.
 
Leather reinforce the high wear and tear portions of the bag. The design of the bag is not only practical but aesthetically pleasing as well.

- last updated 25-09-2013, need to sleep... further updates will come along as I put it into good use.

10 / 10

Tuesday, September 10, 2013

Leica M (Type 240) Short Review


The new Leica M (Type 240)

It has been 3 weeks since the arrival of my Leica M (Type 240) which was ordered in late March this year and I have decided it is time to write up something on this. Over the past two weeks, I had opportunity to test the new M at night with a Noctilux 50mm f/1.0, Summilux 35mm ASPH (FLE) and Summilux 50mm ASPH.

Improvements over M9 / M9P, Ergonomics and Feel (9/10)

Although I have not had an opportunity to own one of the previous generation of Leica Ms, my friends (one with a M9 and the other with M9P) had kindly let me played around with their beloved Ms while I was still using Nikon D700 and a M6, waiting for the arrival of my new M.
The camera use and layout seemed more intuitive than those of M9s, especially the new thumb scroll wheel.

The shutter unit has been changed and improved over M9. It is now capable of faster continuous exposure, if one needs it, and much quieter shutter noise - although it is still no where as close to those of M3s, M6s and MPs.

Inclusions of Live View function had led to rearrangement of the buttons on the back panel of the Leica M and the first button on top left is now Live View instead of play. This will probably cause owners of M9s and M8s to hit Live View instinctively when reviewing their shots on the rear LCD. This should not pose a problem for users who do not frequently review their images on the LCD.

The new rear LCD is now a 3-inch T FT monitor (921,600 pixels) with scratch-resistant Corning® Gorilla® glass, offering higher resolution screen (compared to the M9). This allowed for more critical focus evaluation of images in the field. The screen also seemed more responsive, probably due to the new image processor used for the new M.
The rear selection thumb wheel has been redesigned and now similarly styled like most DSLRs with a slight bump allowing some form of support for your right thumb. This support unfortunately seemed to be insufficient for my case and I ended up purchasing Match Technical EP-10S for Leica M (http://www.matchtechnical.com/Pages/ThumbsUpEP10S.aspx). The additional support provided by the thumbs up was enough for me to justify the additional costs.
Powering the M is now a 7.4v 1800mAh battery upped from the previous 3.7v Li-ion battery. This is essentially two M9 batteries packed into one unit. The higher capacity and voltage coupled with the new CMOS sensor would theoretically give a higher image count per battery charge especially since the use of a CMOS sensor in place of a power hungry CCD sensor. Although there were claims of approximately 1000+ images per charge, with low usage of the rear monitor and live view function, I was only  able to take below 600 pictures before the battery ran out of juice but that was probably attributed to the fact that I left my camera around on the single charge over two weeks to accumulate 500 pictures.

Image Quality (10/10)

The image sensor used in the M is a new CMOS sensor developed by CMOSIS with microlenses specially designed for rangefinder lenses since they focus closer to the sensor compared with SLR lenses. CMOS sensors have several advantage over CCD sensors - power consumption, dynamic range and noise are some of these.

The new sensor seemed more tolerable to wrong exposure settings as it seemed to have an additional stop or two. It fairs well in low light with up to ISO3200 usable (easily). With such high ISO usable, one may not get Leica Noctiluxes for their low light shooting capability but more for its artistic values. With this in mind, I am considering Leica Super-Elmar 21mm f/3.4 M lens over the Summilux model since wide angle lenses generally give good depth of field unless the focus extremely near.

Below are some examples of images taken in low light condition with high ISO settings -

Noctilux 50mm, f/1, 1/250, ISO1600, Larry


Summilux 35mm ASPH FLE, f/1.4, 1/350, ISO800
Summilux 50mm ASPH, f/1.4, 1/500, ISO800
Summilux 35 ASPH FLE, f/1.4, 1/45, ISO1000
Summilux 35 ASPH FLE, f/1.4, 1/90, ISO1000
Summilux 35 ASPH FLE, f/1.4, 1/125, ISO1000
Summilux 35 ASPH FLE, f/1.4, 1/45, ISO1250

Summicron 50 APO ASPH, f/2, 1/350, ISO3200
 
The 50mm Summicron APO ASPH was technically flawless. But some people may actually like the flaws and character of lenses like the Noctilux f/1.0. I would think that having an album with all technically flawless image may be a little boring although I am in no position to say it would be! - since I could not afford a small f/2.0 prime lens that cost twice my 35mm FLE!
Built quality (10/10)
Unfortunately all this comes at SGD$10,800.00 (Body Only) in Singapore and had a relatively long waiting time (at the time of writing this, I waited for my unit for more than 5 months!). Compared to other similar systems (are there?) There seemed to be a lot of comparisons to Sony RX1 or other similar compacts which are actually not true rangefinders! Fujifilm X-Pro 1 or any of their X-series (at the moment of writing) are NOT rangefinder cameras - they do not focus by triangulation so there is no point in comparing against these.
Leica is currently the only manufacturer who does digital rangefinder systems so to be fair, I would give 10/10 considering the built quality and the new inclusive weather sealing but Leica did had some manufacturing issues during initial production and some cameras were recalled due to loosening lugs (BUT! Leica was willing to repair any damage that was caused from the lug failure - such as camera fall damage due to lug failure!).
Costs (4/10)
The only negative was the asking price of 10.8k. This was because the built quality and the rangefinder mechanism allows it to! The cost is a deterring factor to the mainstream users.
I believe most of us would like to see if Voigtlander (Bessa), Zeiss (Ikon) – actually both were manufactured by Cosina, or any other manufacturer introduce similar M-mount digital rangefinders in the future. Until then, Leica ask for such price because it can.
Conclusion

Overall, shooting experience with the new Leica M is best described by one word: addictive.
9.5 / 10

Monday, August 26, 2013

It arrived..finally...

And after waiting for 2 weeks of custom clearance and weekends (customs don't work on weekends in Singapore, they have good life?).. it arrived..
 
Parcel from Rahn foto and fine arts, delivered by TNT express. (Leica M, Summilux 50mm f/1.4 ASPH)

Saturday, August 17, 2013

Something to come: Leica 50mm Summilux ASPH initial impression

Leica 50mm Summilux ASPH

Leica Summilux 50mm f/1.4 ASPH in Silber Chrom
(micro-Nikkor 105mm f/2.8, multi off-camera flash flanking from both left and right with yellow filter attached on SB800 and SB700)

Yes! Silber Chrom! That was not some spelling error, it means Silver Chrome in Deutsch. I had this lens for more than 1.5 years now and had no opportunity to have a proper first impression due to the fact that I had no digital camera that is capable of accepting M mount lenses. This will change by the end of next week!

The chrome version of this lens, shown here, weighs a hefty 460gm. That is pretty heavy for a little guy of this size!

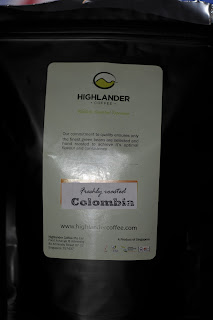
Single Origin Coffee - Hunkute from Nylon Coffee Roasters and Colombia from Highlander Coffee

Single Origin Coffee
Disclaimer: This post has completely nothing to do with cameras or photography.

Something I could not live without (for long periods of time). I rarely had the opportunity to compare two different single origin coffee beans different roasters side by side simply because I don't buy and stock up coffee. Hunkute (Ethiopia) from Nylon Coffee Roasters and Columbia from Highlander Coffee. Both are single origin arabica coffee - meaning they are not blend of mixture of coffee beans from different farms or regions but are from the same farm. Most of the coffee we find in supermarkets and cafes were blends (ie Starbucks three regions, etc..) there are exceptions, but these were few. Single origins allow us to fully appreciate the distinct flavors associated with coffee grown in the particular farm or region.


Hunkute (Left), Colombia (Right) double shot of approximately 16g through approx 60ml. (micro-Nkkor 105mm f/2.8 with SB800 at 1/8000s)
Nylon Coffee Roasters, a small coffee roaster started out sometime in the middle of last year (2012) in Everton - within close proximity of Singapore General Hospital. It was a "micro"-roaster and have seasonal runs of wonderful variety of single origins from different farms. The downside is the runs were seasonal - this means they will not run for indefinite amount of time! Similarly to Bokasso, also an Euthopian single origin, the Hunkute was sweet as an espresso but more lively! I have tried aeropress method of brewing which resulted in a coffee that wasn't sweet compared to the espresso. The profile was completely different so don't waste it on aeropress - the way it is meant to be tasted was non other than through an authentic espresso machine! I felt it would be a waste to run these through v60 drip so I never bothered to try especially since this costs almost twice as much compared to the coffee from highlander! This particular one is meant to be enjoyed as an espresso!
I quite like the Bokasso single origin which ran prior to Hunkute.


Hunkute from Nylon, 300g(micro-Nkkor 105mm f/2.8 with SB800 with difusser to avoid glare at 1/8000s)
Highlander Coffee was one of the pioneers to roast coffee in-house, providing freshly roasted coffee to consumers in Singapore. They have a terrific espresso blend - Supremo Blend which I loved and still love ^_^
I started out getting my beans supply from Highlander Coffee after countless disappointment with different coffee beans from places like Starbucks, Coffee Bean & Tea Leave and concluded that freshly roasted coffee beans contributes to approximately 60% of how a coffee will taste!
The Colombia has a heavier body than Hunkute, a hint to moderate smokiness which Hunkute completely lacks, and the smell could really be considered pungent compared to Hunkute. I dislike the word pungent because I find that is meant to be reserved for Sumatra Mandheling I once had (like 6-7 years ago) in a cupping session. I noticed the beans was more brittle most likely the result of darker roast compared to the Hunkute from Nylon.
I quite like this Columbia from Highlander on my machine but have yet to try it through an aeropress or v60 drip.


Hunkute from Nylon, 300g(micro-Nkkor 105mm f/2.8 with SB800 with difusser to avoid glare at 1/8000s)
Conclusion?
They are different and not meant to be compared! -_-"  I change beans from time to time because I find myself loosing too much of my sense of taste if I stick to one blend or single origin coffee. It felt refreshing to get back the some coffee you tried previously but didn't quite appreciate then.


Thursday, August 8, 2013

The Leica M6 - enterence into rangefiner world without breaking the bank.

The Leica M6 has been around for a very long time (as of 2013). It was my first Leica camera and would probably stay with me for how long my Leica gear is going to serve me, unless I had the resources to splurge on the latest MP. This camera was the beginning of my rangefinder path.

After all these years using Single Lens Reflex cameras, I wanted a rangefinder camera for its compactness and simplicity. A quick and simple search online for a rangefinder solution revealed little choices. Only Leica, Cosina, Zeiss (manufactured by Cosina), Voigtlander (also manufactured by Cosina) and Mamiya still manufacture true rangefinder.

Zeiss a film rangefinder body, the Zeiss Ikon. It was solidly built but not by Zeiss. And so, I eliminated this off my list.
Voigtlander Bessa comes in different 'trim' or 'model'. It was also not built by Voigtlander. Thus, I also eliminated this off my list.
Mamiya's rangefinder were in medium format and too big for my liking so I did not consider it.
Then enter Leica. Made in Germany. - well this what it took for me to have it on the very top of my want list.


The Leica M6 - Simplicity with built in light meter.

For a start, Leicas were expensive and yes, they are much more expensive now (digital era). I need a camera with a built in light meter and does not break my bank. M3 does not have a light meter built in. M6, M7 and MP had built in meters but M7 and MPs are too expensive.

I bought this particular M6 second hand at about SGD1600, it was in mint condition with no scratches and no user marks. Shutter speed sounded correct. Typically, due to the nature of mechanical cameras, one could typically expect to see some signs of usage such as scratches and marks at least below the film advance lever.

My first few rolls of film through this camera revealed no issues with shutter speed or the rangefinder mechanical coupling.


Visible on this photo are the shuttle speed dial, flash shoe, film advance lever / crank, shuttle release button (threaded) and shutter release counter (no. of frames taken since loading the roll of film). One thing particularly neat about manual Leica rangefinder were it's horizontal travel cloth shutter (for benefit of those who do not know, most if not all SLRs and modern cameras including Zeiss Ikon and Voigtlander Bessas are vertical travel shutters), with the Leica M7 as an exception due to the 1/4000 shutter speed and auto aperature mode.

 
The film rewind crank was angled at 45 degree, allowing faster film rewind.

 
This little red dot is the lens release button.

 
Frame line selection lever, allows preview of different frame lines available on a 0.72 magnification viewfinder.

 
This window gathers light provide the illumination to the frame lines.

 
The window on the right is the rangefinder which provides the triangulation for estimating distance between the film and the subject.

Saturday, August 3, 2013

Nokton 50mm F1.5 VM ASPH Review

Today we will have a short , real-world review of the new Nokton 50mm F1.5 VM ASPH pictured below. The lens is vintage, classic looking packed with the latest technology from Voigtlander/Cosina. We are going to see if it can perform in the night, where the bigger aperture should come in useful.

Ergonomics and Feel (9/10):
The feel of the Nokton is extremely solid. The focusing ring turns very smoothly throughout the entire focusing range, although a bit too tight. There are no areas where the focus becomes tighter or more loose. It can feel a little too hard on the fingers. Half-apertures are avaialble throughout the entire aperture ring, clicks very nicely, not audible, but enough to feel. Again, very solid. However, without any tab, users like me who have started off with a Leica 35mm may find it very hard to adapt to pre-focusing this lens. While it is widely accepted that F1.4s users do not pre-focus most of the time due to the small and narrow depth of field, I would have liked to have the flexibility. Some notch on one of the focusing etches would have saved my day multiple times. The size of the lens is extremely compact, just a little longer than the Leica 50mm f1.4 with the hood on(and very similar dimensions without the hood). In this aspect, the Nokton gets a straight 9 out of 10.

Sharpness (7.5/10):
Nokton: 1/250s at f2.4, ISO 320
Coming from a Leica 35mm F2 ASPH where sharpness is one of the outstanding points of the lens, I did not expect the Nokton to be any sharper. And that is exactly what I got. The lens is reasonably sharp at f1.5, and stepped to F2 or F2.8, it does get a little bit sharper. People who wish to get this lens will do well to note that you will not get fantastically sharp images compared to the Leica counterpart (50mm f1.4), but you will get reasonable amounts. At 1/4 the price, it does perform to expectations, and gives a nice feel to the overall picture. It is not necessarily a bad point - it is simply the limitation of optics packed into such a small lens.

Bokeh (8/10):
Nokton: 1/45s at f2.0, ISO 400
Bokeh is really a matter of personal preference. The above shot was taken at low light condition and somehow Leica records the aperture at f2. I thought I had it at f1.5. We can still see pretty bokeh here.  General you get a swirl-shaped bokeh around the centre. It does add to it some kind of charm, but it reminds me of my older nikon lens which gave similar bokeh. Not my favorite, but good enough.

Conclusion:
The wider aperture does come in useful at night. I was able to take certain shots that I was not able to as easily with less blur. However, since I am came from a 35mm family, where the focusing distance is not as picky and narrow, I actually found it very difficult to get used to the 50mm. (This will apply to all 50mms, not just the Nokton. ) Walking on the streets at night, often exciting and interesting shots will come out of the blue where you least expect it. Having some sense of pre-focus would have enhanced the experience and enable you to get somewhat good shots, but do not expect yourself to have well-focused, non-blurry shots all the time. Nonetheless, this is more of a experienced and skill-related evaluation, which is inherently not related to the lens.
Now, for the most part, the utility of the lens remains the same. At 1/4 of the price of a Leica 50mm, it does perform to standards that are extremely close. The built of the lens IS perfect, and I can find nothing wrong with it. For that, I would give it a big...

9 / 10


Tuesday, July 2, 2013

New Lens - New Beginnings

A sneak peak of what's to come :)


 Half-assed review will be coming up soon! Stay tuned.

Tuesday, June 11, 2013

Angkow Wat Sunrise


Leica M9P, 35mm F2 Summicron
Handheld multiple exposures recombined into HDR

Wednesday, May 29, 2013

Leica 6 bit coding for lens


Abstract
Leica earn alot of money by just replacing flange with new 6 bit flange. 6 bit coding for Leica M lens could be DIY easily and neatly, most importantly - cheaply.

Intorduction
Leica has introduced the 6 bit coding system for lens identification with digital M bodies. Since its introduction, Leica has offered to code compatible non-coded lens for a (small) fee. Sending lens to Leica to be coded meant it would be "out of commission" for at least 2-3 months. There are a lot of alternative methods to get the lens coded; Sending to a camera technician (a reputable one), using markers or pencils to "paint" the 6 bit code or buy a flange that has the 6 bit code region recessed and paint it yourself!

Painting on a proper flange would mean a lifetime 6-bit code, unlike temporary solutions with marker or pencils - these would wear off with repeated lens change.

Methods
6 bit flange for 35mm lens was purchased from eBay (please find one that will fit your lens; depending on when your lens is produced, it may have different screw positions.) Black and white automotive paint from Art Friend was used to paint the 6 bit code. A 26G needle and 1 mL syringe for painting. Ethanol was used to clean the flange before painting of 6 bit code.

Results
With the 6 bit code deciphered and available on the internet, it was easy to know what code is used for the lens (in this case, a Summicron 35mm ASPH). 6 bit code from the summicron shown was from http://www.l-camera-forum.com/leica-news/leica-lens-codes/


With the code determined, proceed clean the flange with Ethanol. This would remove any oil based residue that was present on the flange, it helps the paint to stick better.


Do take note on the type of flange you are ordering (some have different screw positions), check that the screw positions are correct for your lens before purchasing! It is important to note as well that the flange type (35mm in this case), will be taken into consideration by the camera as well as the code you are going to paint it on. It won't work if you paint a 50mm noctilux f1 code onto a 35mm flange!


After cleaning the flange, prepare the paint brush by filling up the syringe! - this is the trick to get it done neatly and leave no mess to clean up! Don't be bothered to get a fine paint brush for this purpose, nothing works better than a fine gauge needle!


Proceed and drip a little paint at a time, wait for the paint to dry a little before applying more! The surface tension will allow the paint to fill in nicely in those little recessed holes!!
 
 
Once you are done with black, proceed with white paint - this is just purely cosmetic, the camera really doesn't read the whites.
 

Done! Leave dry and don't touch! Until approximately 24 hours later. Replace your old flange with this and congratulation, you now have a 6 bit Summicron (or what ever...)
 
Discussion
The flange obtained was of good quality. There was no free-play, just like the original non-coded flange. Given the simplicity and cost of DIY, there was never a need for discussion!